Sharon sent some of the photos she took during our Friday, June 5th printmaking day with Marilyn Bishop.


Here are the stages of the color being applied to the frosted plexi.
First, Sharon's stages...(sorry, I don't have a photo of the finished print but it was wonderful).

Sharon put her first layer down much thinner than I did mine but it's still just pure color (a peach mix Sharon chose) on the glass using a flat brush.
Then comes the dabbing and adding with a soft natural sea sponge, thinking about what your composition is going to be.

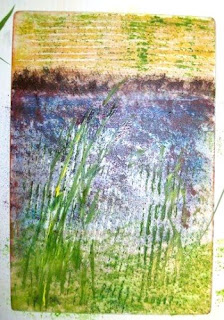
Marilyn said you put down 3-4 layers so working on that 3rd layer now...here's where you can stamp or cut into the color, lifting some if you want or...you can put something over the plate before printing (which is what Sharon did) to create a resist on the print. Sharon put a piece of grass/willow over the plate and then printed it, leaving a great space to add color to later.

And here are Marilyn's stages - she's an old hand at this and knows what she's doing so knew she wanted to work with a grid pattern and some round shapes, too. She worked with sponges and a sponge roller to put the paint on the plexi and she splattered some paint on, too.


I don't have a photo of Marilyn's finished print, either, but I bet she puts it up on her blog soon.
No comments:
Post a Comment