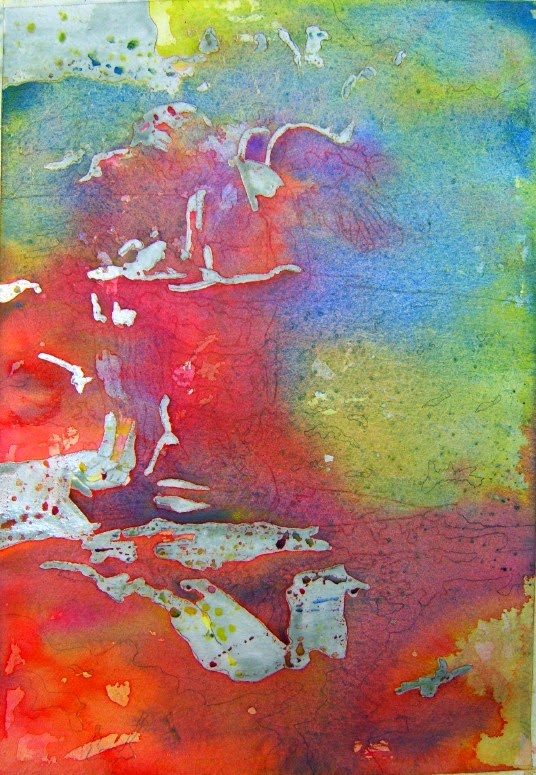
After the first 3-color pour dries, you can see if you need to adjust color or darken any areas. And do another 3-color pour, using the pipette filled with watered down pigment to direct the colors into the areas you want. Let the run-off pour into your container and dispose of that (it will be a muddy brown color from mixing the 3 colors).
Let that dry and then, if you have what you want, remove the masking fluid (remember, all that grey stuff is masking fluid and all those areas will be white and hard-edged on your painting).
So...do you want a lot of hard edges? No? Then take a nice scrubby brush (lots of art supply stores have them and I think Cheap Joe's calls his Fitch Scrubbers). The brushes are just short, hard-bristled brushes. Go easy on the paper, here, or you'll scrub off a lot of the paper!
Prewet the edge you want to soften by just dropping a small drop of water along the area from the scrubby brush, wait a few seconds and then gently scrub away the color a little, working on small areas at a time - don't scrub on your paper if the area is dry because it will scratch the paper.
After you do this, it is almost impossible to go back into that area with paint - it will look bad and rough. So...make sure you want those softened edges where you want them.
And then - you are done!
The finished painting with a lot of edges softened.
Hope you try this and have fun with it. You really only need a little paper, 3 tubes of color (yellow, red, blue), some masking fluid, a pipette to direct the colors, and a tub to contain the overflow while you're pouring.
Enjoy!


15 comments:
Hi Rhonda!... The joys of painting... need not be restricted to the use of brushes alone as your post more than proves!
This colourful little gem emerges... it seems... from out of no where. And yet the "idea"... came from some one... right Rhonda? HA HA!
Nice post!
Good Painting...and Experimenting!
Warmest regards,
Bruce
So fun! I'm trying this tomorrow for sure.
Wow, Rhonda! I love that finished painting. Really beautiful!
Yey, Rhonda, master piece!!! Really good. Thank you for sharing wonderful knowledge. Best wishes, Sadami
Outstanding!377
This is the first time I've actually seen the technique done and it is so interesting! Where do you get the drawing gum?
Thanks so much, Bruce - I think fall going into winter is a time for no restrictions! I'm enjoying visiting and travelling with you (virtually).
Hope you enjoy it, Anita!
Sherry, thanks so much!
Thanks, Sadami :) Thanks, Pam!!
RabbitRabbit, you get the Pebeo Drawing Gum from any art store - all masking fluids work, if you can't find it, but it does give you some color on the paper to show where you've been - and doesn't stain the paper when you remove it.
Rhonda - this is extremely lovely. You achieved such a softness to this piece. Thank you for inspiring me to give this a try. You are a wonderful teacher.
I love how this came out. I can't wait to try it...when I'm at my sister's house. :)
Hope to see this in a show! It's GREAT!
I love that painting! I've never done that -I'm definitely going to try!
Thank You,
Sabine
Thanks so much, Debbie. Your comment made me smile :)
Thanks, Deb - maybe in a show - do we have one coming up before next year? ha ha
Thank you, Sabine, for stopping by and for commenting. Let me know how it turns out for you and if you like it!
Ok, got my colors mixed and am ready to go.
Lovely! So light-filled and glowing--totally appropriate to the subject too.
I love the lack of details!
Absolutely lovely! Such a soft, light-filled, and tranquil quality. You are producing great results with all the techniques you're trying!
Post a Comment