Wednesday, November 13, 2013

PHOTOS FROM GLEN HELEN NATURE PRESERVE


Just a few more photos - these were all taken by Sweetie (a.k.a. Jerry H. Carpenter) - from our recent trip and hike in Glen Helen Nature Preserve in Yellow Springs, OH.  

Does anyone know what this pink-leaved tree is called?  


A plaque in the woods, called Helen's Stone.  Helen Birch Bartlett was the daughter of Hugh Taylor Birch who purchased the Glen and donated it to Antioch College in memory of her).

Click to enlarge and read.


A beautiful tree full of yellow-gold leaves.


A very handsome fellow in one of the wooden cages at the Raptor Center within the Glen.  Sleeping, he opened one eye a bit to give us a look when we peeked in.


See you later!


Monday, November 11, 2013

TEXTURE FOR CLASS


On Tuesday, I'm going to pass out some Tyvek paper and let the students try it just to see what interesting texture it creates for you by just painting on it.  I wasn't sure what to have them try but I saw an old lighthouse painting with rocks that I did in a class many years ago (this is on gessoed paper but the rocks got me thinking).  I looked up some lighthouse photos from WetCanvas and found one I liked.  I printed it out and enlarged it (so it's a good size for tracing) for everyone to use.


When tracing onto Tyvek, I don't want harsh graphite lines showing so I took a watercolor pencil, colored the back of the photograph and then traced the photograph, which left faint blue watercolor pencil lines on the Tyvek paper - which usually can be washed away when you start painting.  Then I painted the sky, the water, the lighthouse and the rocks.  I put in that shape behind the lighthouse and was going to leave it white but painted it with cerulean blue - just to add more variety.  The crease in the painting is due to my keeping the Tyvek shoved behind my watercolor paper in a Cheap Joe's container and some of the sheets got a little bent.  Not sure it will come out but it's just a class demo so no big deal.  I could still go in and really go to town on the rocks - more like the top painting - but I kind of like the softer look of the bottom rocks.  Anyway, I'm ready for the class.

Today is Veterans Day.  
For all those who serve or have served, thank you.

Sunday, November 10, 2013

NOT REALLY M.I.A. JUST STRETCHED THIN


My busy time began last week and it seems I haven't caught up yet.  Wednesday, we had our regular watercolor meeting.  I always arrive early to help the program person set up.  It was a great program with Taft Museum of Art curator, Tamera Lenz Muente, giving the talk and PowerPoint show on Winslow Homer's Adirondack watercolors.  Everyone was very complimentary about her program.  


Homer painted hundreds of watercolors, many of them from his years spent in the Adirondack area.  The paintings are of hunters, fishermen, and nature around the area before it became a place for tourists (which meant more roads and buildings and more people).  

 If you are interested in seeing some of the paintings Tammy showed us, just go to http://www.winslow-homer.com where you will see the complete works of this fabulous artist who painted in oils and watercolor.  He had a real respect for watercolor, considering his watercolors to be finished works, not just studies or preparations for oils.  While I do like the Adirondack watercolors and realize he is painting a way of life, my favorites are the ones he painted in Bermuda and the Bahamas - I think because of the light in those.


After the program, we had a Leadership Team meeting.  Deb and I only had about 1/2 hour or less to attend that to share in the discussion about the new team members coming in March 2014 and what we are going to do without a Program Chair (since no one wants to take it on for 2 years).  

Then we had to jump in our cars and drive to Mariemont for our first drawing class in the Russian tradition - from Natasha Kinnari from Stalingrad.  


Oh, my!  One would think it would be easy to draw boxes.  But it was not!!  We were all sent home with homework - although some students got "stars" in class for their in-class work, I did not.  I sure hope I'm not going to be the slow kid in class - or have to wear a dunce cap (and if I do, I hope it's a colorful one in cobalt blue with crows on it!).

I am seriously spatially challenged.  When Natasha would come to my easel and stand and look at what I was drawing - and then make changes to the angles of the lines I'd drawn, I couldn't see that the changes were correct and I was wrong.  What's up with that?  I never could put those bits together to form shapes in school tests, either.  I just don't "see" it.


So...I was up at 5 am Friday morning, rummaging around for boxes around the house.  I got my drawing materials together, set up my box on a table, and tried my hand at drawing a box.  A simple box.  Sweetie even tried to help me when he got up much later - which he did, to an extent but he wants me to use a ruler and a compass and a protractor and Natasha says that is "technical drawing" which is not what she wants us doing.  Oh, dear.  I have to "train my eyes to see" correctly.  So far, I'm going to need a lot of training!


What else has kept me busy?  
Getting a lesson ready for my students coming Tuesday.  (I was so busy last week, I had to cancel last week's class because I didn't have a lesson plan ready or materials for the students.  Turns out 2 students couldn't attend anyway, so that wasn't too bad.)  I am ready for this week and am going to let them try out Tyvek paper.

Oh, and I've begun taking Pilates.  Yep, I finally decided I am not going to get in shape by wishing I was in shape.  This studio makes you take 4 introductory sessions with an instructor - one on one - before going into classes.  And I've had 4 one-hour sessions on the Reformer (that Pilates machine that is the foundation of studio Pilates classes) already and signed up for 5 more + 5 classes.  I like the attention to detail I get with the instructor (Kelli, who is great!) so I'm doing the exercises on the Pilates Reformer correctly and getting in tune with my core - making my center stronger should help my back and shoulder issues - plus it just makes me feel better; like I'm doing something besides sitting around gaining weight in all the wrong places.

So that was my week.   I have my first Pilates in a class situation this morning.  I'm not sure early morning is the time my body wants to work out, but there are only 5 spaces available when using the Reformers, and you have to take the time that has openings. So Sunday morning, it is.  

And I will try drawing boxes again today (hopefully, with less hair pulling and gnashing of teeth this time).   I have to figure out how to measure, how to get the angles right, and how to lessen the tension I feel whenever I pick up a pencil in a drawing class - and get over myself and just do it!  (That's after I clean the house to get ready for Tuesday's class.)

This may not seem like a lot to most of you, but for me, it's a lot of things keeping me busy - and trying to keep track of when I can schedule things and when I cannot.  Whew!!!  I think I may need to get a day planner! ha ha


Tuesday, November 5, 2013

A DAY IN THE WOODS

Sunday, Sweetie and I drove up to Yellow Springs, Ohio.  It's a funky, quirky, fun little town just east of Dayton.  It is the home of Antioch College, a liberal liberal arts college that closed down in 2008 due to board members malfeasance with the funds - then opened again in fall 2012, I think.  Small group of students (35 started back when the college reopened - all on full scholarship) and few faculty (I think less than 25).  But what a pretty place!  Great ginko trees in the campus lawn and old buildings - plus just across the street is the Glen Helen Nature Park/Preserve, a 1,000 acre wooded site that belongs to Antioch Collage.  Sweetie and I walked the trails and saw some lovely sights - plus got a lot of exercise going up and down the many stone steps, carefully using the stone stepping stones over the creek, hiking all around (we took a wrong turn and was glad another hiker pointed us in the right direction because my feet were getting sore).

Here's what we saw:


Pompey's Pillar, a large rock column which has broken away from the cliffs and is slowing creeping down the slope of the hill.  Can you see Sweetie at the base, adjusting his camera for photos?


Travertine Grotto, the small waterfall coming off the top of the travertine mound forms the grotto; and the reddish travertine is the calcium carbonate stained by iron.  The Yellow Springs (for which the town is named) is farther up up up...


The Yellow Spring.  The famous spring carries 60 gallons of iron-rich water to the surface every minute.  Prior to 1948, the spring flowed into a large pool. Visitors once bathed in its "healing" waters.

I love the colors of this, with the dark green growth mixed in with the reddish rock.


Much farther on the trail we came to the bottom of the Cascades on Birch Creek.  We sat on a wooden bench at the bottom and had a breakfast bar for a snack before climing up more stone steps and crossing a bridge, heading to the Raptor Center to see their hawks and owls (and one bald eagle).  All but the bald eagle were in wooden-slatted cages enforced with wire, making it difficult to see the birds and even more difficult to take photos.  

It was a great hike, a nice trip (the view of the trees in full autumn glory along the roadsides was beautiful!!), and I think we'll return some time in the future, perhaps even staying the night in the Grinnell Mill (built in 1821 and renovated in 2005-2006) B & B for a long weekend trip.


Monday, November 4, 2013

WATERCOLOR SOCIETY MEETING AND PROGRAM

Our November meeting will be one you may not want to miss if you're in the area.  
Taft Museum of Art Curator, Tamera Muente, will give a talk and a PowerPoint show of paintings from Winslow Homer's Andirondack watercolors.  Tammy gave an excellent talk and show of John Singer Sargent's watercolors last year and received such a great response to that program that I was asked to bring her back to talk about another favorite watercolor artist.  

The meeting is Wednesday, November 6th from 10 - 12 at The Cincinnati Art Club building on Parkside Place in Mt. Adams.  Come join us and learn more about Winslow Homer and his Andirondack inspiration for some of his amazing watercolors.  This will be the closest thing to viewing Homer's work in a museum.


Sunday, November 3, 2013

A POEM FOR NOVEMBER

November
by William Cullen Bryant
 
 
Yet one smile more, departing, distant sun! 
One mellow smile through the soft vapory air, 
Ere, o'er the frozen earth, the loud winds run, 
Or snows are sifted o'er the meadows bare. 
One smile on the brown hills and naked trees, 
And the dark rocks whose summer wreaths are cast, 
And the blue gentian flower, that, in the breeze, 
Nods lonely, of her beauteous race the last. 
Yet a few sunny days, in which the bee 
Shall murmur by the hedge that skirts the way, 
The cricket chirp upon the russet lea, 
And man delight to linger in thy ray. 
Yet one rich smile, and we will try to bear 
The piercing winter frost, and winds, and darkened air. 


Saturday, November 2, 2013

LEARNING TO DRAW

If you want to get better at your drawing - especially portrait drawing - then I recommend you check out Michael Britton's Art Academy site.  Here is a link to the October offerings on the eyes and the nose.  All of his monthly offerings are well worth studying and trying.  If you sign up for his newsletter, you get tons of free information you can print out and take into the studio with you.  Not tackling the whole portrait, but getting familiar with the parts, is a good way to do it without getting tense and discouraged.  Remember your negative talk inside your head can cause tension, too.  When you say, "I can't do this!"  you are probably going to be right.

I've ordered a few of Michael's downloads, too, and he is very thorough.  It's not his fault that I get to the middle and quit doing the daily work!  Seems like it's time to try again.  Every piece of information adds to the knowledge you have.  One day at a time.  
When learning anything new, it helps to be gentle with yourself.  Don't berate yourself because you're not great right away.  It will take time and effort.  I need to be kinder to myself when trying something that is new and difficult for me instead of becoming a weenie and walking away because it's "too hard".

And, with that in mind, I have just learned about a great offering in drawing in "the Russian style" locally.  The teacher, Natasha Kinnari, is a local artist who has won many of the Woman's Art Club juried shows, taking top prizes each time.  She knows her stuff.

Rather than make excuses, I am just going to sign up and do it!


Friday, November 1, 2013

PORTRAIT ON TYVEK: STAGE 1


For this painting, I wanted to use the photo but make some changes.  A greenish background and red hair were the changes I wanted from the dark red background and dark hair of the photo.

I began this one on Tyvek, something Myrna Wacknov paints on all the time.  I drew it while looking at the sketch (not the photo) I did in the recent portrait workshop, using a red watercolor pencil to draw on the Tyvek.  This stage is just the first layers of paint.  I'll do the mouth and darken some features before I do the eyes.  Right now I think I'll remove some of that ear, blending more hair around it, and widen the hair mass on her right side (it looks a bit thin right now).

I like the texture of the Tyvek.  It is all through the paper so you just work with it and accept it in the skin.  

I am going to let my students have Tyvek paper and try it out next week during our regular class.  

Thursday, October 31, 2013

HAPPY HALLOWEEN


Happy Halloween

Our weather guessers say we are in for a rough Halloween, with wind and heavy rain storms.  Those witches and spooks will be flying, if they are brave enough to come out tonight.

Wednesday, October 30, 2013

WORKSHOP DAY 3


The first part of the day, 10-11:30, was spent with Fran telling us about the shape of the head, where the eyes, nose, mouth, ears are placed.  That we need to measure angles in the head (like the angle of the nose - is it straight across or does it go up on one side).  She had some drawings on tracing paper to illustrate this.  We only got to spend 1 1/2 hours on this because the model was scheduled to arrive at noon and we had to eat lunch before she arrived.

If you're going to draw or paint portraits, you will need to learn the general rules and then learn to measure to check that your model's nose isn't longer than normal, or that he has a large forehead and small chin, etc.  Each person is different and each person's features are different.  So, get yourself a good drawing portraits book and you'll learn all these rules that will help you start.  

As for sight measuring, I've only seen that used in a figure drawing class and I thought I knew how to do it until I began trying with our model at noon - and then everything I had learned flew out the window!


Our model for the afternoon (sorry about the blurred photo).
She was a professional, sitting for long stretches of time without a break, and not complaining - and not moving at all!!


And here is my sketch of the model, in my Aquabee Sketchbook.  In looking through previous sketches in that book, I see it's been since 2009 that I was doing figure drawing through Manifest Gallery's Drawing Center!  I need to get back to that because it's obvious that you lose it if you don't use it!

Due to the nature of the workshop, we didn't have easels and weren't standing to draw - we sat at our tables and tilted our paper upright so we wouldn't get too much distortion.  Fran said to leave out her arms because I'd made them too small, so I just painted her head and shoulders when I began painting.  We drew first, then painted, while the model still sat and posed.


Again, background first (this drawing was traced onto watercolor paper and I left out a lot that I was going to try to put in with paint later).  I hated it and it was too solid and heavy, so I went back and sprayed it off with a heavy-duty sprayer.  That's what caused the streaks.

Then hair - I tried to keep it light and painterly.  I was using only three colors through the painting:
Raw Sienna
Quinacridone Rose
French Ultramarine Blue

This is where I finished up.  She doesn't look like the model - more like the model as a young girl?  Not sure I'll do more to it but might try this one again since I have the sketch to work from and the model's photo for colors.

The three days were tough.  Long hours, Fran was a real task-master, working us hard and no fooling around chatting with your neighbor - back to work!!  Fran teaches workshops in the Columbus, OH area (she's done workshops at the Columbus Museum of Art).  If you're interested in seeing her work, just google Fran Mangino and her midlife series will come up, along with a couple of articles she wrote about using photographs as reference material and projecting your work and tracing (which she showed us on the 2nd day of the workshop).  I don't think her webpage has been updated in a while - but you can google her name and some of her more recent paintings will come up.


Tuesday, October 29, 2013

WORKSHOP DAY 1 + 2

Just finished a 3-day workshop with Fran Mangino, an Ohio artist who has been accepted and won awards in the Ohio Watercolor Society juried shows and the Cincinnati Art Club Viewpoint juried shows, as well as winning first place in The Arnold Schwartzenegger art venue in Columbus, OH.  

Fran is adamant about stretching and stapling your paper to gatorboard (or a similar surface) before working on your painting.  She said the artist, Paul Jackson, told her if she would do that, her work would rise a level - and she has been doing that ever since.  So in prep for the workshop, we had to have our paper stretched, stapled and ready to go the first day.  I did not soak my paper but wet it on both sides until it was soaking wet, then placed it on the gatorboard and stapled it before it dried very much at all.  My paper still buckled when I worked on it, so I'm not convinced it makes a difference - plus I like tilting and moving and twisting my paper as I'm working on it without the extra weight and stiffness of the gatorboard.  But I did try it :)

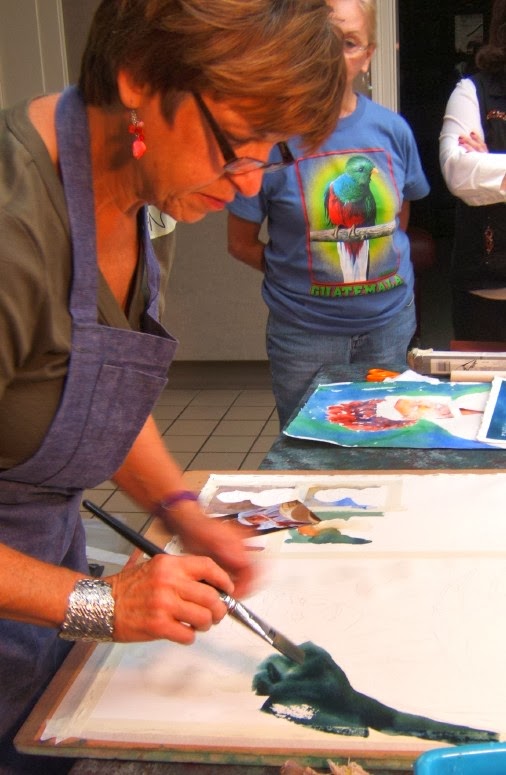
The first day, Fran had us trace a drawing she had done of a drummer girl from an Asian event held in Columbus, OH.  She was one of many drummers on stage and the red hair caught Fran's eye.  Unfortunately, a hand holding a drumstick was in the drawing and we all traced it - then discovered it was the hand of the male drummer next to the girl and so looked backwards.  And none of us could erase it before it was painted - so I just left it out of my painting.  


Fran insists that the first thing you do is take a small sketch and decide on your background color.  So we did 3 small versions of the drummer girl (from a 4 x 6 photo) on scrap paper and then tried out 3 difference backgrounds, choosing our favorite before beginning our large (half sheet) painting.

Here is Fran's paper.  She has 4 little versions to choose the background color, then her larger piece (taped off from the studies) is drawn and ready to go.

Fran said to plan our paintings and then paint - and stop being so timid!


Fran put her background in using a large puddle of colors.  She had just taken a workshop with Mary Whyte, and told us Mary uses the same colors in her backgrounds that she uses on her skintones - Raw Sienna, Quinacridone or Permanent Rose, and French Ultramarine Blue.  She picks 2 of those colors and adds a third and makes her background.  This way, you get color harmony in your painting.

Fran's color was a dark green color, not much variety in the colors, but mixed on the palette and then put on the paper.  


The background color was painted all around the drummer girl - so you had to have a large, dark puddle of color mixed up to do this on your own version when it was time for us to go back and paint.  Although there was no variety in the color in the background, that was created by lifting and leaving some white areas untouched around the green.


Then it was time to paint in that red hair.

Mixing several colors (see top photo) of burnt sienna, cadmium red, french ultramarine blue (but not mixing them on the palette), Fran pulled from the burnt sienna first and then put in darks and more color interest with the other 2 colors.  The hair, at this point, had hard edges all around.  Fran talked about softening edges and how you must have soft edges in order to avoid making your subject look like it's pasted on the background.  In this case, her hair had to be softened all around and around her headband to make it look natural.  This was done with an almost dry brush and "smooshing" it around the edges, lifting out some of the color and softening everything.  Fran also said we need to throw away our synthetic brushes and invest in Kolinsky sable brushes.


Then it was time to start on the skintones.  Again, using Mary Whyte's favorite mix, Fran mixed up Raw Sienna, Quinacridone Rose and French Ultramarine and began working on the skin.  Here is where you look closely at your photograph to see the colors, the highlights, the shadows and the small changes in the skin.

Fran walked around the room constantly, picking up brushes, giving orders (at one point, one of the workshoppers asked her how long she'd been in the army! ha ha) and advice on colors and edges, as we all worked on our versions of the drummer girl.
And we eventually got to the place where we could put in the colors in the girl's "white" outfit.

Of course, although the outfit was white, we had to use color to convey that and to get the shadow shapes in the fabric of her tunic and headband.  

We were supposed to be using the a bit of the color we chose for our background, but we all began like Fran did, with blues and violets in the shadows.  Then we had to go back and add in that background color, not matter what color we chose.


Fran has all her lights and medium values in the painting at this point and now it was time to put in the darks - and the eyes.


Fran's finished version of the drummer girl.  You can see where she tied in the green background in the clothing at this point.

Our homework, after the first exhausting day, was to go home and, using your own photograph, draw it on your watercolor paper then wet, stretch, and staple your paper to gatorboard (or a similar support).  So we'd be ready for Day 2 and would be doing our own paintings.


Here is the first day finish - my version of the little drummer girl:


I did not get the skintones finished, I put in the drumstick because it was too darkly drawn to leave out, and I need to darken values in the clothing and drum.  Her eyes are not finished at all.  
But I worked continuously - a long 6 hours standing and painting with homework after!!

There is a lot wrong with this but I never expect to paint something good in a workshop.  A workshop is for experimenting, trying new things you didn't think about before, and for seeing how others handle the same thing. 


For my portrait for the 2nd day, I chose a photograph of an artist blogger, Molly Brose.  I used to follow her blog all the time and she was doing some interesting and beautiful work on yupo with watercolor, graphite and China markers (a waxy pencil).  But she quit posting back in 2009 after having a baby.  Anyway, this photo is not mine so I won't use it for anything but study - but I loved the light on her face so wanted to try to duplicate that.  

When I brought my work in and had my background color chosen, Fran asked me why I wanted to make the background green and didn't want to use that gorgeous red that was in the photo.  I was going to use a green background and make her hair red - but I stuck with the photo colors.

I didn't draw this freehand, but traced the photo, then enlarged it on our printer and traced that onto the half sheet of watercolor paper.  Fran was also not happy that I made it a horizontal, not a vertical (like the photo).  (I thought I was using my artistic license and making changes I wanted to make.)


This is as far as I got the second day.  Background went in first.  Then the dark hair.
I had it on too heavy all around her face, so Fran came around and lifted some areas, talking about making it more painterly and not so hard-edged.  (I hadn't had time to lift and blend around the face so Fran did that, too.)  She walked around and helped everyone individually, commenting, asking for changes to be made or making those changes herself (which was okay, it's just a study).

So this is a painting of a person from a photo I didn't take, didn't get permission to paint her, and Fran helped with the hair.  

Fran pointed out that, in my drawing on the watercolor paper, I'd made her shoulders too narrow.  She asked me to look at her (Fran), measure her head width, then see how wide her shoulders were compared to her head - I did that and saw that I had made Molly's shoulders too narrow.  I widened them but I probably did too much. 

So two days hard work and struggling and on the third day we rest?  NO!!!  We work from a live model!!!

Stay tuned...


Monday, October 28, 2013

EXPERIMENTATION 2


I think this one is finished. 


Acrylic ink + Watercolor on 
half sheet 140# cold press Fabriano 
watercolor paper 


Land and Sea No. 1


Need to drive up to Evergreen and pick up my painting from the show.
No sale this time.  While I'm doing that, Sweetie is in charge of the workers who are coming to put down new carpet this morning.  It's going to look great!!!

Sunday, October 27, 2013

WEEKEND WORKSHOP WITH FRAN MANGINO

I'm on my 3rd day of a 3-day workshop taught by Ohio artist, Fran Mangino.  I come home exhausted mentally and don't want to do anything - but we had homework the first evening :(  I am not used to painting and standing (I can't paint while sitting right over the painting on the table) for 6 hours straight and my body is telling me that.  

The subject is portraits and I need help (and more dedicated practice time) with that subject!  So...I'll let you know how it went after I've recovered from 3 solid days of painting and learning.


Friday, October 25, 2013

EXPERIMENTATION


Beach Scene No. 1  (1/4 sheet watercolor paper)

I saw something that caught my eye in the latest Watercolour magazine (shipped from the UK).  I wanted to see if I could do something similar.   While the middle "water" was wet, I laid torn bits of spider webbing over it and put a piece of paper on top of it and then some books - and let it dry before pulling off the spider webbing.  
It looks like a beach scene, with the wave ready to crash onto the beach.


No photo reference, just began with watercolor on a half sheet.  Wiping the color on with a large flat brush.  Breaking up the design and coming up with some organic shapes.  I tacked it onto my bulletin board and drizzled acrylic inks over it and let them run down down down.  
Not finished but close.  
  

Land and Sea No. 1  (1/2 sheet watercolor paper)

This was a lot brighter before the acrylic ink dried.  I'll have to remember that the bright acrylic inks dry duller and more muted.


Wednesday, October 23, 2013

MISTY MORNING


Sweetie and I took a trip this past weekend - just a 2 hour drive southeast - to hike in Natural Bridge State Resort Park.  The leaves were not in full autumn glory.  In fact, the spots of bright red, orange, or gold, were few and far between.  A late autumn?  Or no autumn at all?  

Although I wasn't the only one huffing and puffing to make the almost straight up climb to Natural Bridge (a .75 mile hike), I realized how out of shape I am and my body was tired that evening.  We hiked a lot, ate too much (they don't serve small servings or small meals at the Hemlock Lodge dining room!!), and didn't sleep well at all the night we spent at the Hemlock Lodge.  (The Lodge was fine with every room having a balcony surrounded by trees, but the fan kept clicking on and off all night and I never sleep well the first night in a strange place.)


Since we didn't sleep well, we rose early the next morning and took another hike (this curving and downward moving path was much easier, ending at the lodge pool area and pond first so the hike back up didn't seem so hard on our legs).  The early morning mist on the water and sunlight streaming through the trees was beautiful and we were the only ones out and about.  Quiet, beautiful nature at it's best.  

Everyone down in southeastern Kentucky says their fall is late in coming.  I wonder if a day trip, just to drive down and hike and return home at night,  is in order later?  Maybe a phone call first to ask about the leaf colors.  Autumn may just not come this year.  They are predicting snow this week!

There is something completely rejuvenating (even if you're pushing yourself physically) about nature.  There is a special joy and contentment that comes from walking in the woods, hearing birds singing, seeing and hearing little streams racing down rock faces to create mini waterfalls, crunching through leaves that cover the ground path, just hiking and looking around, breathing in the air.  I could live in the woods. 

What about you?  What place makes you happy?  
Are you a woods person or a seaside person?  
Do you need a mountain view, or a small, secluded valley blanketed with early morning fog?  


Monday, October 21, 2013

NOT A PRETTY PAINTING

I'm in a restless mood.  I am not finding inspiration that lasts more than an hour or two. I know I need to "find" my own voice and my own subjects that truly move me and can sustain me.
  
So far, I've flitted from this to that.  Except for the crow series, I haven't really landed and stayed on anything for very long.  


While waiting for a pretty painting to dry, I began thinking about pretty paintings - and if that is what I want to paint.  And I, as much as anyone else, enjoy seeing a beautiful painting.  

I painted this (Tap Root) just from putting down colors, creating shapes and textures.

I think I need to take some time for goal setting, thinking, and perhaps less time on the computer.  

Time away for a while will be good, I think.  Although I know I can't stay away for long - this blogging thing has become a habit.

What, if anything, does my work say about me and my life?  
Maybe it's time to do some experimentation; time to paint a few ugly paintings until I come up with what I'm looking for in my work.  

See you soon!

Saturday, October 19, 2013

PART OF A POEM

A partial excerpt from 
The Magpie's Shadow


The Magpie's Shadow
by Yvor Winters


I. IN WINTER

Myself
Pale mornings, and 
   I rise. 

Still Morning
Snow air--my fingers curl.

Awakening
New snow, O pine of dawn!

Winter Echo
Thin air! My mind is gone.

The Hunter
Run! In the magpie's shadow.

No Being
I, bent. Thin nights receding. 


The Magpie's Shadow was published in 1922 as a collection of short, experimental poems. While studying at the University of Chicago, Winters was diagnosed with tuberculosis and decided to relocate to Santa Fe, New Mexico, for the sake of his health. His early poems, published in 1921 and 1922, were all written at a tuberculosis sanitarium.

Thursday, October 17, 2013

PITCHER PLANTS HANGING


I was going to use the acrylic ink + watercolor technique for this.  But then I realized that I don't like using masking fluid and I don't do well with using it (the hard edges leave me struggling to soften without wiping away everything).  So...just went the straight watercolor route with this painting.


From a photo taken in Florida a few year's ago.  Sweetie and I were in a park and there was a plant sale. Saw these hanging in individual pots from a hanger - they are pitcher plants and looked so interesting.

Which way do you like them best?  They actually were hanging down like the second version, but I kind of like the first one that is upside down.

More to do to finish it and I have a couple of experimental things going on, too.  

Wednesday, October 16, 2013

NO MORE BLOOMING WISTERIA


Back in May of this year, I drove over to my allergist's office for my regular allergy shot - and was met with this gorgeous display of wisteria in full bloom.  I had to stop and take photos.  


The wisteria was completely covering the gazebo underneath until all you saw was the top part of the structure.

I am glad I took a few photos.
Because a construction crew working on the building beside the gazebo has bulldozed the gazebo and the wisteria to the ground!  It should be a crime to destroy something so beautiful as that blooming wisteria and that cute gazebo.  I almost cried...

So instead of a One Word Wednesday, I'm sharing how lovely this was just a few months ago.  All things are impermanent.  But I'm finding it more difficult all the time to be okay with that when it seems loveliness is being bulldozed and ugliness is what replaces it. 
 I could be wrong now...but I don't think so (as the Monk theme song says).